SMILE DESIGN CASE 1
GUREL/COACHMAN WORKFLOW FOR SMILE DESIGN PATIENTS (2009)
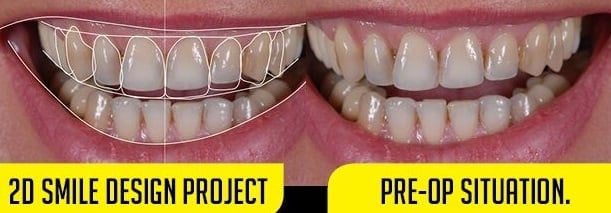
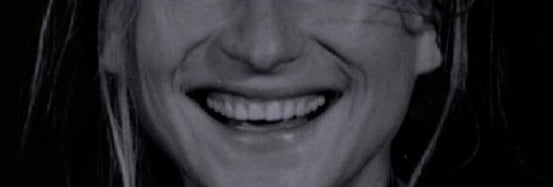
- STEP 1 : Pre-op

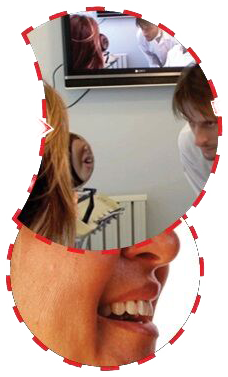
- STEP 2 : Direct mock-up. For dentist with smile design and hand skills. The direct mock-up is a very good strategy to motivate the patient.
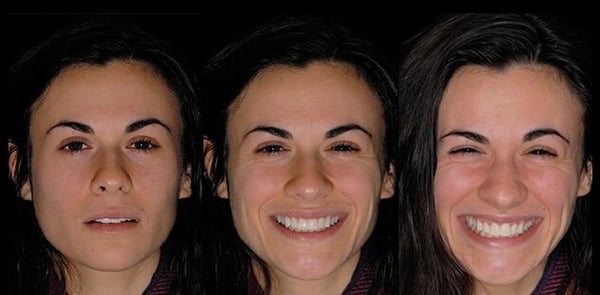
- STEP 3 : Motivation. Presenting the direct mock-up to the patient.
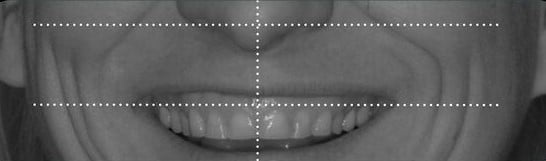
- STEP 4 : Facial dynamic analysis

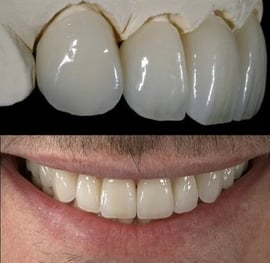
- STEP 5 : Initial interview. This appointment includes morpho-psychological interview for smile design customization (visagism).
2.png?width=308&name=Step%205%20(1)2.png)
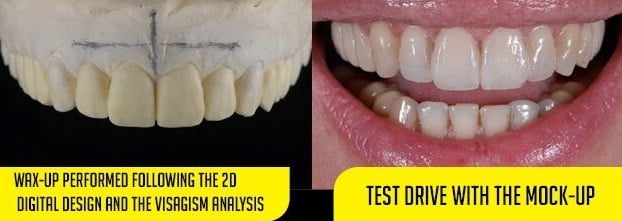
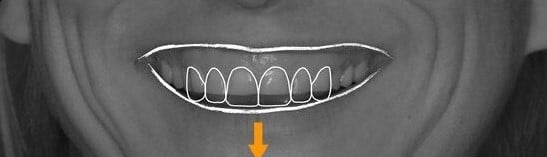
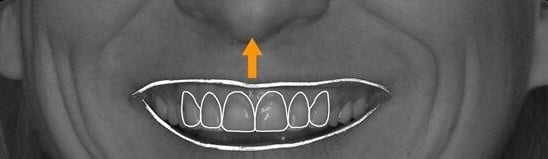
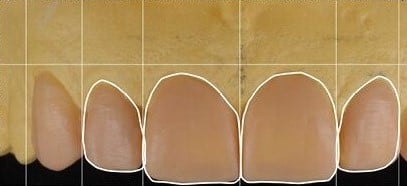
- STEP 6 : Facially driven 2D digital smile design project is performed based on the direct mock-up and visagism interview.
- STEP 7 : Transferring the 2D Project to the model to guide the wax-up
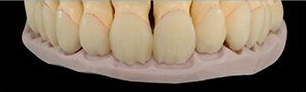
- STEP 8 : Wax-up quality control
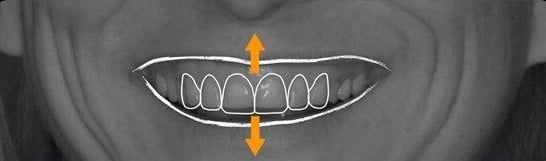
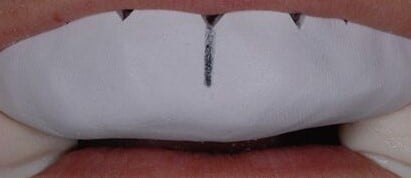
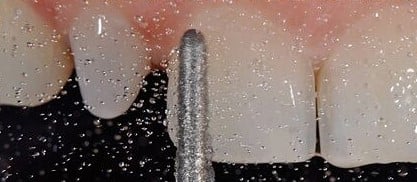
- STEP 9 : Based on the wry-up, indirect mock-up is performed and adjusted. Here, a black marker is used to check the incisal length of the centrals before shortening it.
- STEP 10 : This technical direct mock-up is also known as apt and will be the prep and provisional guide.
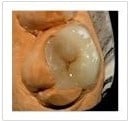
- STEP 11 : Tooth preparatory by design. Tooth preparation is performed through the apt using depth cutters to obtain the most minimally invasive prep with ideal clearance for material resistance and color change.
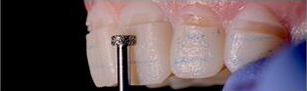
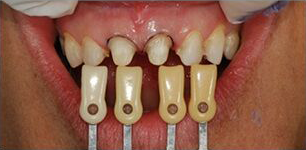
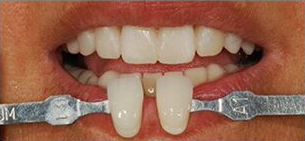
- STEP 12 : Final tooth prep and shade taking. Always taking photos with the stump shade and the desired shade.
- STEP 13 : Provisional. An immediate provisional is made using the same silicone index made over the wax-up.
- STEP 14 : Lithium dissilicate pressed restoration core. The cut back is controlled with the silicone guide.
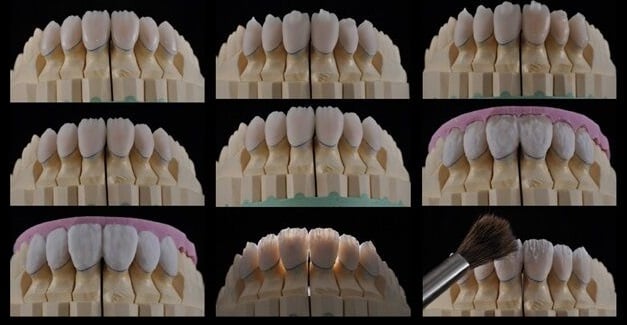
- STEP 15 : Ceramic build-up. Also guided by the silicone index to keep the same approved shape of the mock-up.
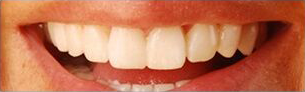
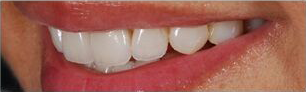
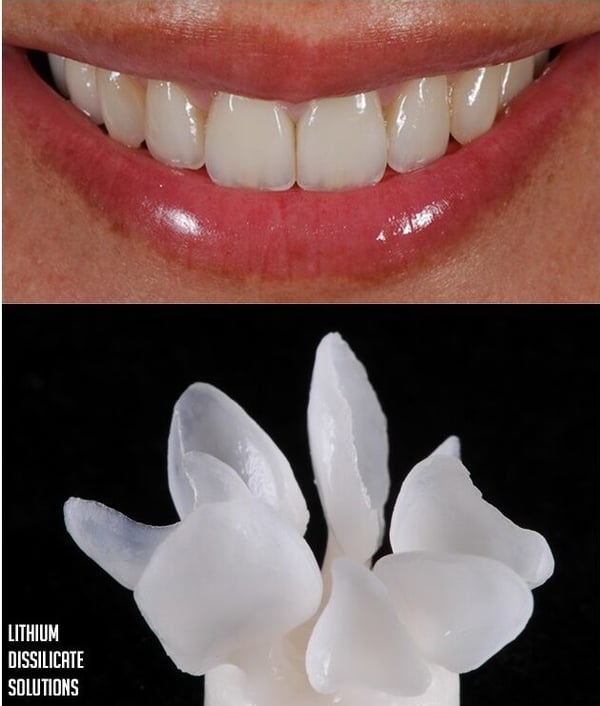
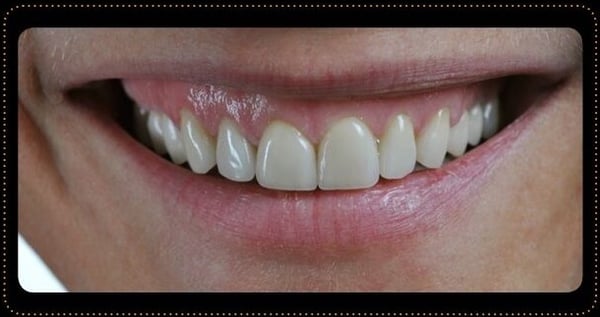
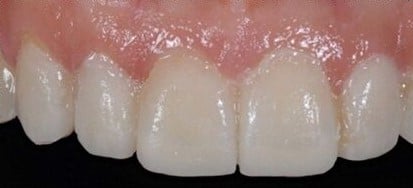
- STEP 16 : Final outcome
- STEP 17 : Follow up (3 years)

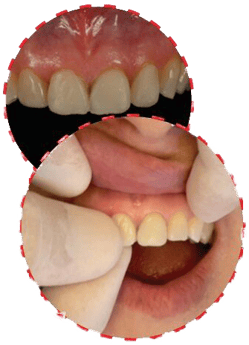
1 | MONOLITHIC BRIDGE
2 | CUTBACK + LAYERED CROWN
3 | CUTBACK + LAYERED VENEERS
4 | MONOLITHIC VENEERS
5 | MONOLITHIC ONLAY
Clinical work performed by Dr. Galip Gurel, Lab work perfomed by Christian Coachman and Adriano Schayder
SMILE DESIGN CASE 2
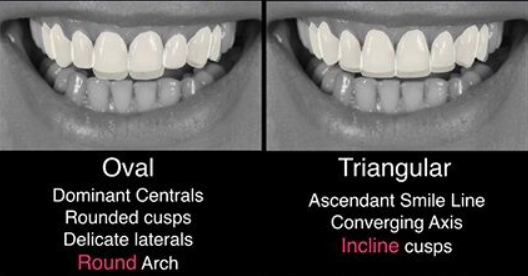
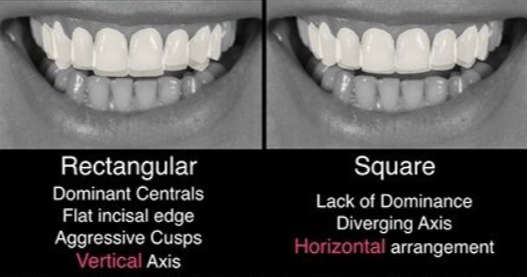
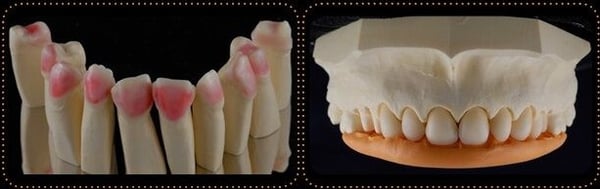
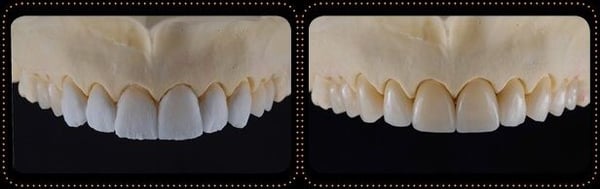
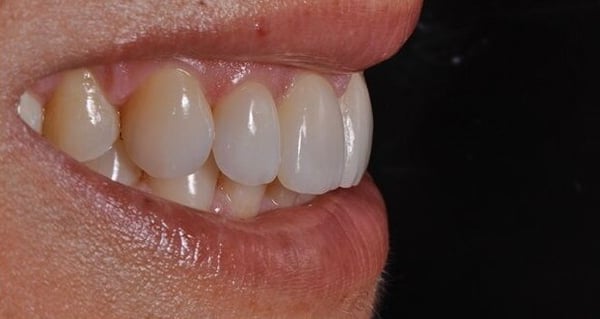
Smile Visagism Analysis (Braulio Prolucci Concept), The choice of this case was to create a mix design between the Oval/Melancholic/Sensible with the Triangular/Sanguine/Dynamic.

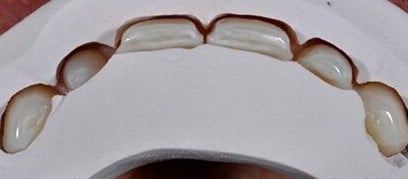
EMAX HT PRESS was the material of choice, pressed with a thickness of 0.2-0.3mm
Ceramics by Christian Coachman
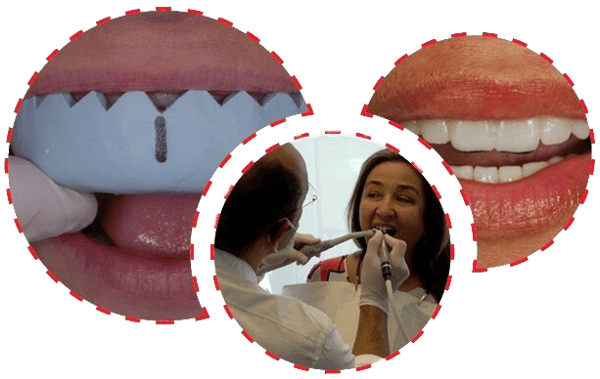
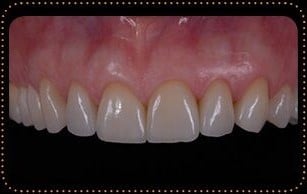
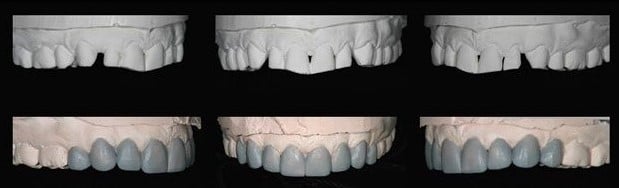
SMILE DESIGN CASE 3
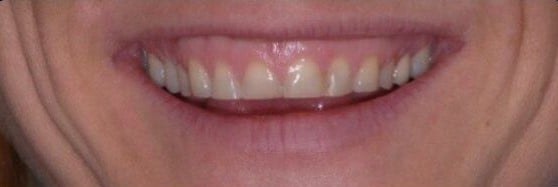
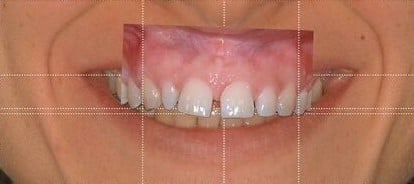
Patient with worn dentition and gummy smile.
Quality control of the wax-up

Motivational mock-up
A "snap on" removable crown lengthening guide was made.
Guide in position
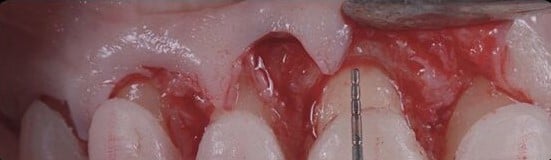
Surgery performed using the guide and respecting the biological width measurements.
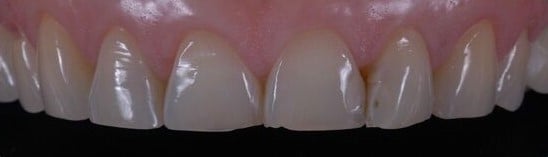
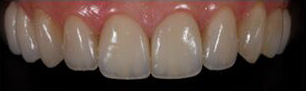
After soft tissue healing.
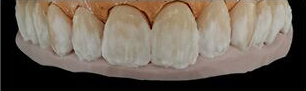
Final tooth preparation and impression.
Perio-Prostho Clinical work by Eric Van Dooren, Ceramics by Christian Coachman
SMILE DESIGN CASE 4
Intraoral photo is calibrated to the facial photo with the guidelines.
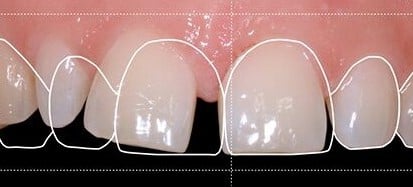
2D Smile Design Project
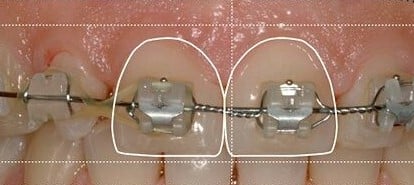
After orthodontics, quality control procedure is done by overlapping the drawings to check if tooth movement respected the initial project.
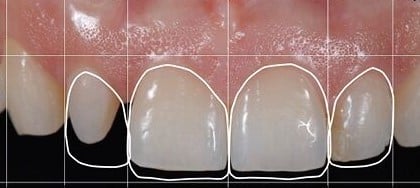
After removing the braces the 2D project is recalibrated.
The wax-up is done over the model after ortho.
Silicone guide done over the wax-up for the motivational mock-up.
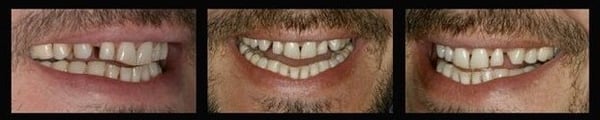
The additive mock-up.
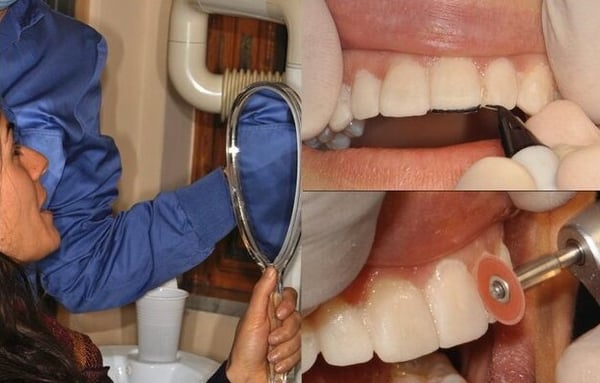
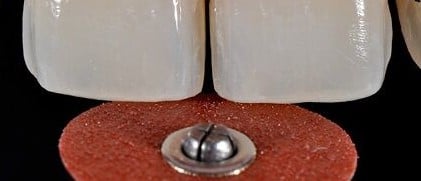
Presenting the mock-up to the patient initially with photos instead of the mirror is much more powerful from the emotional aspect. After this appreciation, the patient can have the mirror to go over technical details and modifications can be made with the black marker and discs.
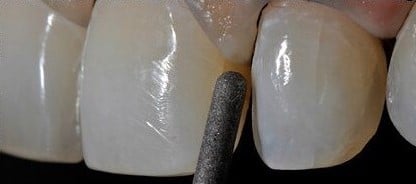
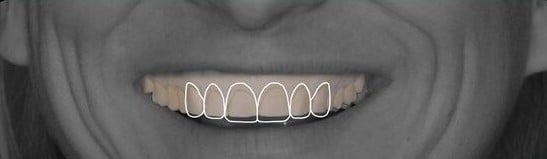
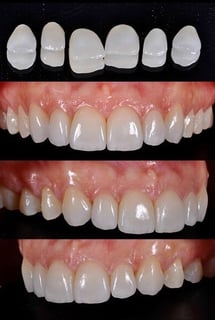
This image shows the final prep without any reduction on the buccal neither on the incisal, just inter proximal preps were needed to allow ideal tooth shapes on the ceramic veneers. This image also shows a very well planned orthodontic movement to allow for almost prepless case to achieve the final ideal design.
Clinical procedures by Dr. Andrea Ricci
MONOLITHIC RESTORATION
This was my first anterior Monolithic case ever. Using Emax press LT A1 , stained and glazed. I was quite impressed with the result.
Clinical procedures by Dr. Andrea Ricci, Lab work by Christian Coachman
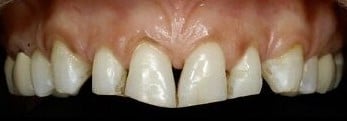
SMILE DESIGN CASE 5
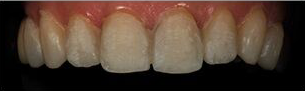
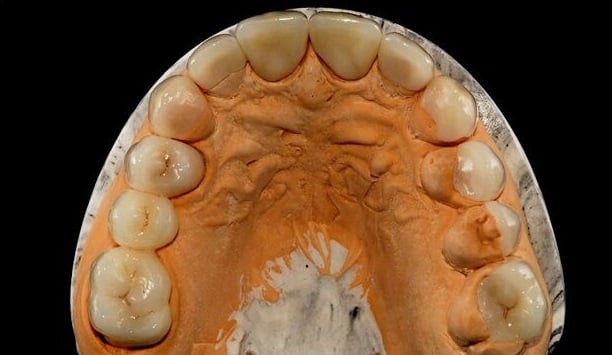
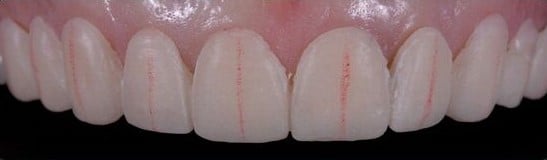
Pre-op situation. The issues were: color, diastemas, space distribution, incisal abrasion, recession/metal margin and black triangles.
The goal was to close the gaps without orthodontics so a careful study was done on the model to plan the shapes using optical illusion and finishing line of the preps to allow for proper emergence profile and avoid disproportional teeth and black triangles.

The mock-up demonstrated that shapes were good and orthodontic could be avoided.
Pre-op
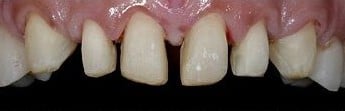
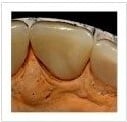
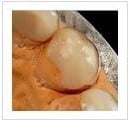
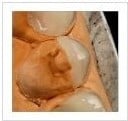
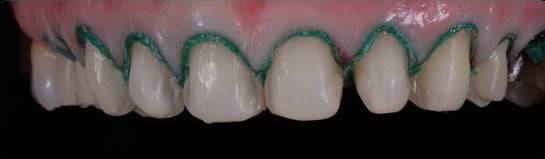
Tooth preparation. Breaking the contacts and going slightly sub gingival inter proximally to achieve better emergence profile and ideal contacts without black triangles.
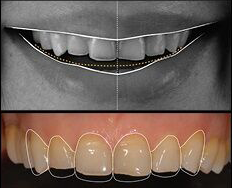
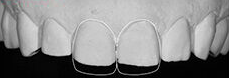
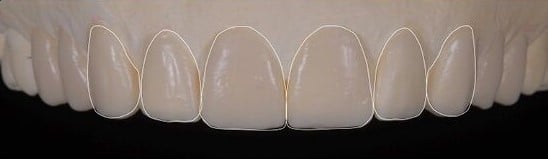
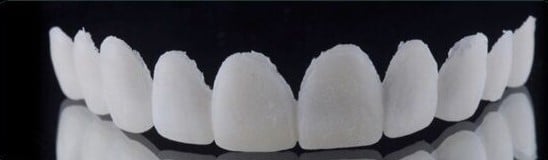
THE BLACK SPACE ANALYSIS
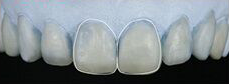
I always enjoyed taking photos of my own work, placing it on the slide and playing with contrasts and saturation to create a complete black and white images. Analyzing these images is very powerful to help our eyes evaluate the incisal embrasures and incisal edge silhouette. I usually do this before final glaze, allowing me to fine tune the shapes. It is like looking at the teeth without looking at them and instead trying to visualize the shapes of the background, THE NEGATIVE SPACE. When filling up extra space is important to work with the line angles and push the challenge towards the most distal area. On this case line angles of centrals and laterals were kept almost ideal and the extra space was mainly distributed by the canine. Also longer contacts were designed to close the black triangles, but the line angles were kept more triangle to give a natural look.
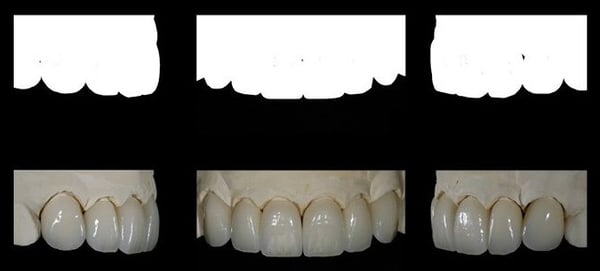
Clinicial procedures by Dr. David Garber, Lab work by Christian Coachman
SMILE DESIGN CASE 6
.png?width=1588&name=Merged%20(1).png)

Becoming A Smile Designer
